The History Of Photography
In 1685 Johann Zahn invented the Camera Obscura. An image was achieved by blacking out a room and creating a small hole for light to pass through which projected an inverted image onto a surface. Later the Camera Lucida was invented, it had the same principle but was much smaller and was therefore portable.
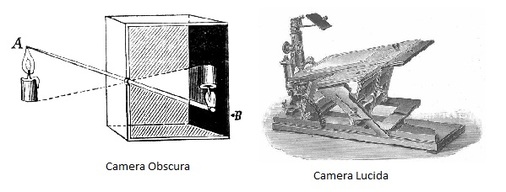
Later in January 1839 Louis Daguerre announced the Daguerreotype. This produced a laterally reversed image that was printed onto a metal plate. Around the same time Henry Fox Talbot invented the Calotype, this was very similar but had an advantage as it could be reproduced as a negative as opposed to being a single, unduplicatable image.
Pinhole Cameras
A Pinhole camera is an optical imaging device and it's the most simple type that can be made. It doesn't contain a lens and has a single small aperture.
How to make a pinhole camera:
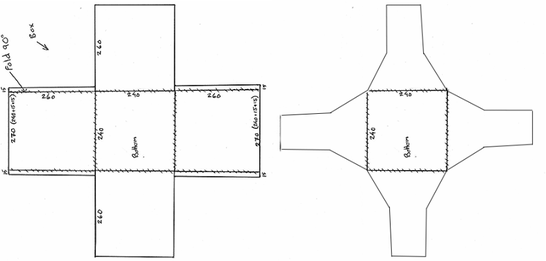
1) Cut a strip of card, 48cm x 10cm and score every 10cm
2) Fold along the scored lines and use remaining 8cm to stick into a cube shape
3) Cut a 10cm x 10cm piece of card and stick two thin strips of card onto two opposite corners of this piece
4) Stick that square onto a 14cm x 14cm piece and taper the corners
5) Attach this onto one of the empty faces of the cube
6) Draw around the stencil provided and cut out. In the center cut out a 2cm x 2cm square and cover with tin foil then prick with a pin
7) Stick this onto the cube, then create a thin strip and attach around the cube so that your flaps can be tucked away
8) Put photo paper inside and fold tabs into the strip, insure its light tight
How to make a pinhole camera:
1) Cut a strip of card, 48cm x 10cm and score every 10cm
2) Fold along the scored lines and use remaining 8cm to stick into a cube shape
3) Cut a 10cm x 10cm piece of card and stick two thin strips of card onto two opposite corners of this piece
4) Stick that square onto a 14cm x 14cm piece and taper the corners
5) Attach this onto one of the empty faces of the cube
6) Draw around the stencil provided and cut out. In the center cut out a 2cm x 2cm square and cover with tin foil then prick with a pin
7) Stick this onto the cube, then create a thin strip and attach around the cube so that your flaps can be tucked away
8) Put photo paper inside and fold tabs into the strip, insure its light tight
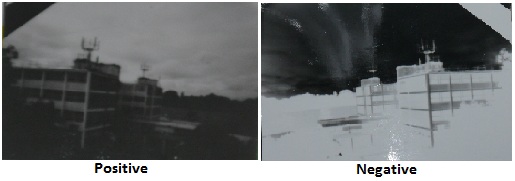
To take a photo with a pinhole camera you firstly place it on a flat surface in order to keep the camera still. You then take off the lens cap and expose it to the light for as long as you wish depending on the brightness of the surroundings. The lens cap is then replaced and once the camera is in a dark room your able to remove the photo paper and process it to produce a negative image.
The first few photos I took with the pinhole camera were slightly blurry, I therefore replaced the tin foil, creating a much smaller hole. This improved the quality of the image. When I took my photos I firstly exposed it for 20 seconds but the image was over exposed when processed. I then took this into consideration and changed the exposure time to 5 seconds, however the images was under exposed. I finally exposed it for 8 seconds and produced the negative picture below. To convert the image to a positive one I took the negative and placed it face to face with some photo paper, I put this under the enlarger with a sheet of glass on top. This was then exposed for about 8 seconds at a high aperture and processed to produce a positive image, also shown below.
The first few photos I took with the pinhole camera were slightly blurry, I therefore replaced the tin foil, creating a much smaller hole. This improved the quality of the image. When I took my photos I firstly exposed it for 20 seconds but the image was over exposed when processed. I then took this into consideration and changed the exposure time to 5 seconds, however the images was under exposed. I finally exposed it for 8 seconds and produced the negative picture below. To convert the image to a positive one I took the negative and placed it face to face with some photo paper, I put this under the enlarger with a sheet of glass on top. This was then exposed for about 8 seconds at a high aperture and processed to produce a positive image, also shown below.
Photograms
A Photogram is a photo graphic image that is produced without the use of a camera. I created my Photograms by placing objects on light sensitive paper and exposing it directly to the light. The areas where no light is received stay white where as the other areas go black or grey depending on the amount of light received.
Firstly I made a test strip by exposing each part of it to the light for a different amount of time. From this I gathered how long the paper needed to be exposed for. I experimented using objects of different opacity and also moved objects while keeping others still, the effect of this can be seen below.
Firstly I made a test strip by exposing each part of it to the light for a different amount of time. From this I gathered how long the paper needed to be exposed for. I experimented using objects of different opacity and also moved objects while keeping others still, the effect of this can be seen below.
Test Strip
I then developed this idea further using different objects:
Development Techniques
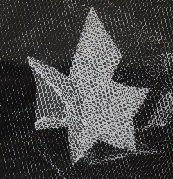
Solarising
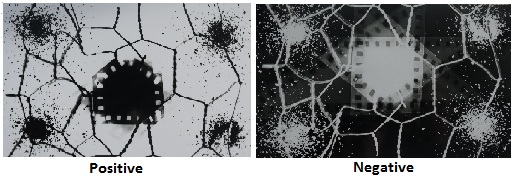
This technique partially inverts the tonal range of a black and white photograph. This is achieved by re-exposing an image to the light whilst it is being processed in the dark room. It gave the objects a silvery, crystallized outline:

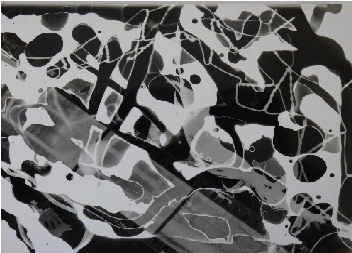
Painting on developerTo produce this image I adapted the development stage. Instead of soaking the photographic paper in the developer, I painted it onto certain sections of the paper. This gave the picture a sense of liquidity, the effect can be seen to the right:
|
|
Dodge and Burn
|
This is a technique used to manipulate the exposure of specific areas of the photograph. 'Dodging' refers to areas of the photo where the exposure has been decreased and 'Burning' is where the exposure has been increased.
I achieved this in the image below by exposing the photographic paper for a couple of seconds, then placing an opaque cut out onto the image and re-exposing it under the enlarger. |
Toning
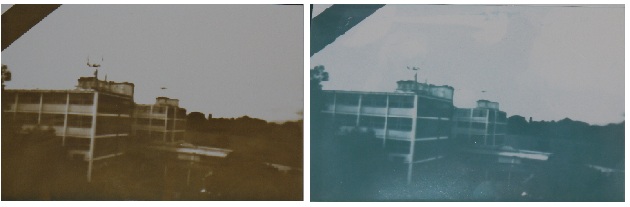
Using my pinhole camera pictures, I experimented with different toners to change the colour of my image. This is done after the photograph has been developed, but when its still wet. Firstly I used a blue toner, this works by turning the darker areas on the photograph blue. I also used a sepia toner, although to achieve this sepia tone I had to bleach the image first and then expose it to the sepia toner.
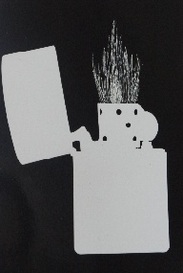
Scratching
|
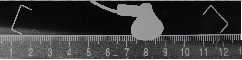
This is a post-printing technique which involves using a sharp object to scratch away certain parts of the photograph. To experiment with this technique I made a photogram of a lighter and scratched in the flame. This gave it a textured look. |
|
Weaving
|
Weaving is a post production technique which involves getting two pictures and intertwining them. This is achieved by cutting each photograph into equal strips and feeding them in together. In the picture to the left, I decided to weave a positive and negative image together. |
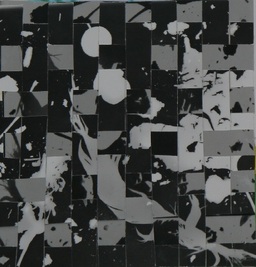
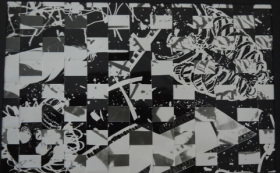
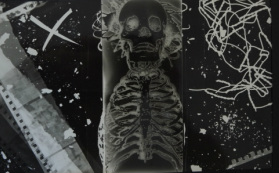
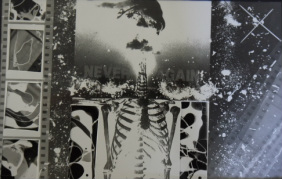
Final Photograms

|
|
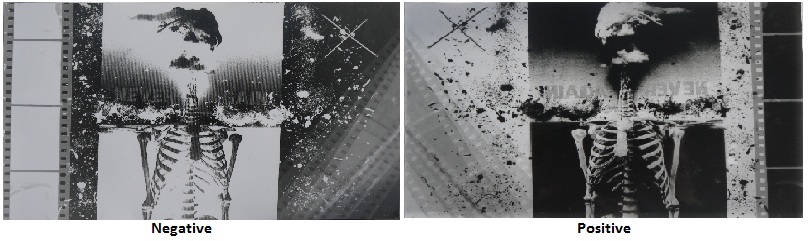
For my final piece on photograms I created 4 photos, combining the different techniques that I had learnt to create more complex photos. I wanted there to be a theme linking all four photograms, and so I used similar objects to link them. I thought the solarising technique was very effective; and so I used it to create a crystallized effect on one of the skeletons. I also frequently painted on the developer, as I like the fact that it creates a less dense image as it creates a watery effect. To make the photos more interesting, I used some post production techniques. I layered various parts of the photograms to create a more interesting pattern and also used the weaving technique.
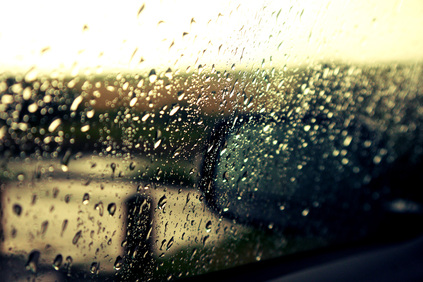
Aperture-Priority - Depth of field
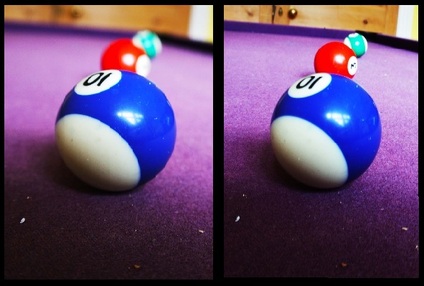
For the left image, I experimented with a small aperture in order to achieve a shallow depth of field. For this photograph I used an aperture of F 20, which created a focused and detailed foreground , where as the background is out of focus. However, for the image on the right, I used a wider aperture of aperture of 5 . 6, this enabled the
|
I then experimented further with aperture to produce this image, which was taken with a small aperture |
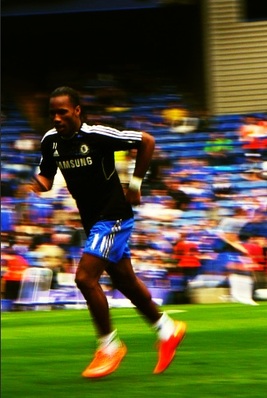
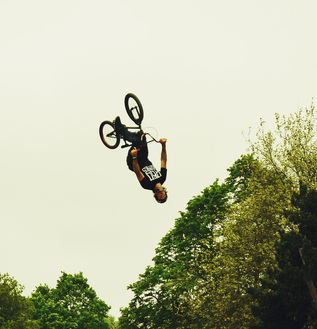
Shutter Speed Priority - Movement/Motion
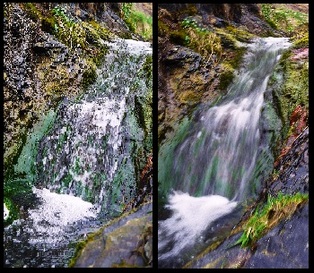
I experimented taking different photographs on various shutter speeds. The left hand image was taken on a fast shutter speed of 1/1000 and so there was a very low exposure time. This gives the photograph clarity, as it enables you to capture images suddenly. On the other hand, the image on the right was taken with a slow shutter speed, I put my camera on the bulb setting and held it for 3 seconds.This long exposure time creates a sense of movement in the photograph.
I then thought more about movement and motion and produced these photographs using different shutter speeds:
I then thought more about movement and motion and produced these photographs using different shutter speeds:
|
|
Film Photography
Developing film:
To develop the film, you must remove it from the camera and go to a dark room. The film is sensitive to all lights and so it must be removed in complete darkness. The canister is cracked open and the film removed. You then cut to film to create a straight edge and feed it into the reel. The film can then be threaded into the spool and placed in the bottom of the developing tank. Once the lid is on you are able to turn on the lights and start to develop the film. Firstly you pour in the developer and agitate it to ensure it comes into contact with all parts of the film. Also, you must tap the tank before resting it to dislodge the bubbles, this is done for the allotted time. Then the stop is added to the tank to prevent the film from developing further and then finally the fix is added. You can then hang the reel of film to dry.
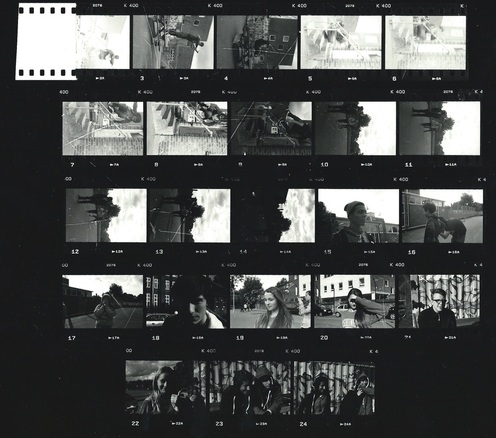
This is my first contact sheet of the roll of film. As you can see not all of the pictures have the correct exposure. There are also markings from the contact glass, as it was scratched.
Developed prints
|
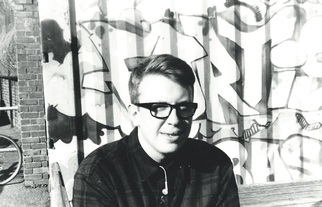
To produce a photograph from the roll of film you must place the negative into the transformer on the enlarger. You then focus the image and place a piece of photo paper onto the projected image. After doing a test strip to find out the correct exposure time, you expose the paper. It is then developed normally in the developer, stop and fix. The photograph on the left is one of the good quality images that I produced on my first roll of film.
|
|
|
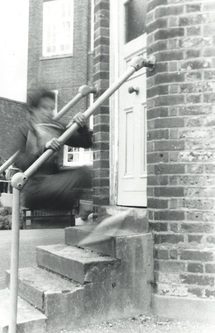
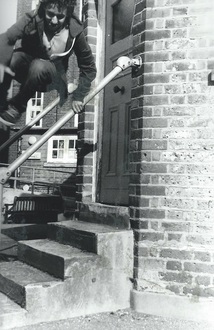
When taking pictures of movement we experimented with different shutter speeds. The photograph on the left was taken with a shutter speed of 1/125 second, it was exposed for too long and the image is therefore blurred. The photograph on the right was taken with a shutter speed of 1/500 second and this enabled us to get a clear picture of the movement.
